Ever wished deploying web apps on AWS was as easy as uploading a file? Enter AWS Beanstalk — your shortcut to hassle-free cloud deployment without sacrificing control or scalability.


What Is AWS Beanstalk and Why It Matters

AWS Elastic Beanstalk, commonly referred to as AWS Beanstalk, is a Platform as a Service (PaaS) offering from Amazon Web Services that simplifies the deployment, scaling, and management of web applications. It supports multiple programming languages including Java, .NET, PHP, Node.js, Python, Ruby, and Go, making it a versatile choice for developers across different tech stacks.
Unlike managing infrastructure manually, AWS Beanstalk automates the heavy lifting—provisioning servers, load balancing, auto-scaling, and monitoring—so you can focus on writing code. It’s not a replacement for services like EC2 or RDS, but rather an orchestration layer that manages them on your behalf.
How AWS Beanstalk Fits Into the AWS Ecosystem
AWS Beanstalk doesn’t exist in isolation. It integrates seamlessly with core AWS services such as EC2 for compute, S3 for storage, RDS for databases, CloudWatch for monitoring, and IAM for security. This tight integration allows developers to leverage the full power of AWS while abstracting away infrastructure complexity.
For example, when you deploy an application using AWS Beanstalk, it automatically provisions EC2 instances, configures Elastic Load Balancing, and sets up Auto Scaling groups. You retain full access to these underlying resources if you need to tweak configurations later.
- EC2: Provides the compute instances where your app runs.
- S3: Stores application versions and logs.
- CloudWatch: Monitors application health and performance.
- Auto Scaling: Adjusts capacity based on traffic.
- IAM: Manages permissions and access control.
“Elastic Beanstalk makes it super simple to deploy and run applications in the cloud without worrying about the infrastructure.” — Amazon Web Services
Key Benefits of Using AWS Beanstalk
One of the biggest advantages of AWS Beanstalk is its developer-friendly nature. You don’t need to be a DevOps expert to get your app running in production. Just upload your code, and Beanstalk handles the rest.
It also promotes consistency across environments. Whether you’re deploying to development, staging, or production, Beanstalk ensures that your infrastructure setup remains uniform. This reduces the classic “it works on my machine” problem.
Additionally, Beanstalk supports both high availability and fault tolerance out of the box. You can configure multi-AZ deployments and automated backups with minimal effort, ensuring your application stays online even during failures.
How AWS Beanstalk Works Under the Hood
To truly appreciate AWS Beanstalk, you need to understand its internal architecture. When you deploy an application, Beanstalk creates an environment—a collection of AWS resources that run your app. Each environment is isolated and can be configured independently.
The deployment process starts with uploading your application code (as a ZIP file or via Git). Beanstalk then analyzes the code, determines the runtime (e.g., Python 3.9), and provisions the necessary infrastructure. This includes launching EC2 instances, setting up security groups, and configuring the application server.
The Role of Environments in AWS Beanstalk
Environments are central to how AWS Beanstalk operates. There are two main types: Web Server environments and Worker environments.
Web Server environments are used for applications that serve HTTP requests. These are typical for websites and APIs. Beanstalk automatically sets up an Elastic Load Balancer to distribute traffic across multiple EC2 instances.
Worker environments, on the other hand, are designed for background processing. They consume messages from Amazon SQS queues and execute tasks asynchronously. This is ideal for handling email notifications, image processing, or data aggregation.
- Web Server Environment: Handles user-facing traffic.
- Worker Environment: Processes background jobs via SQS.
- Environment Tier: Defines whether it’s web or worker.
You can have multiple environments for the same application—like dev, staging, and prod—each with different configurations, instance types, and scaling rules.
Application Versions and Deployment Strategies
AWS Beanstalk treats each upload of your code as a new application version. These versions are stored in S3 and can be rolled back at any time. This versioning system is crucial for maintaining stability and enabling continuous delivery.
Beanstalk supports several deployment strategies:
- All at Once: Deploys to all instances simultaneously. Fast but risky.
- Rolling: Updates instances in batches. Minimizes downtime.
- Rolling with Additional Batch: Adds extra instances during deployment to maintain capacity.
- Immutable: Launches a new set of instances, tests them, then swaps traffic. Safest option.
- Blue/Green: Uses two identical environments. Traffic is switched after deployment. Ideal for zero-downtime updates.
Choosing the right strategy depends on your tolerance for risk and downtime. For mission-critical applications, immutable or blue/green deployments are recommended.
Learn more about deployment strategies in the AWS Elastic Beanstalk documentation.
AWS Beanstalk vs. Other AWS Services
While AWS offers several ways to run applications—EC2, ECS, Lambda, Fargate—AWS Beanstalk occupies a unique middle ground between full control and full abstraction.
Compared to EC2, Beanstalk reduces operational overhead. With EC2, you manage everything from OS updates to scaling policies. With Beanstalk, you still use EC2 instances, but AWS handles the orchestration.
Against ECS (Elastic Container Service), Beanstalk is simpler for non-containerized apps. ECS is ideal for microservices using Docker, but requires knowledge of container orchestration. Beanstalk supports Docker too, but also works with traditional deployment packages.
Beanstalk vs. EC2: Control vs. Convenience
EC2 gives you complete control over your virtual servers. You choose the AMI, configure security groups, set up load balancers, and manage scaling manually. This is powerful but time-consuming.
Beanstalk, in contrast, automates all of this. You define your requirements in a configuration file, and Beanstalk provisions the infrastructure. If something goes wrong, it can automatically replace unhealthy instances.
However, Beanstalk doesn’t lock you in. You can “go deep” and access the underlying EC2 instances, modify configurations, or even terminate the environment and take over manually if needed.
- EC2: Maximum control, maximum responsibility.
- Beanstalk: Balanced control with automation.
- Use EC2 when you need custom infrastructure; use Beanstalk for faster deployment.
Beanstalk vs. AWS Lambda: Serverless Showdown
Lambda is a serverless compute service that runs code in response to events. It scales to zero when idle and charges per millisecond of execution. This makes it cost-effective for sporadic workloads.
Beanstalk, however, runs continuously. It’s better suited for long-running applications like web servers or APIs with steady traffic. While Lambda has a 15-minute execution limit, Beanstalk has no such restriction.
If your app requires persistent connections, background workers, or complex initialization, Beanstalk is often the better choice. Lambda excels for event-driven, short-lived tasks.
“Lambda is great for event processing, but for full web apps, Elastic Beanstalk is more practical.” — AWS Developer Forum
Setting Up Your First AWS Beanstalk Application
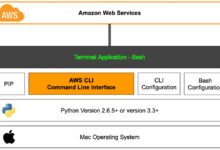
Getting started with AWS Beanstalk is straightforward. Whether you’re using the AWS Management Console, CLI, or SDKs, the process is intuitive.
Let’s walk through creating a simple Python Flask application and deploying it using Beanstalk. This example will give you hands-on experience with the platform.
Step 1: Prepare Your Application Code
First, create a basic Flask app. Here’s a minimal example:
from flask import Flask
app = Flask(__name__)

@app.route('/')
def home():
    return 'Hello from AWS Beanstalk!'

if __name__ == '__main__':
    app.run(host='0.0.0.0', port=5000)
Save this as application.py. Next, create a requirements.txt file listing dependencies:
Flask==2.3.3Finally, zip the files into a package: application.zip.
Step 2: Deploy via AWS Console
1. Go to the AWS Elastic Beanstalk Console.
2. Click “Create Application.”
3. Enter a name and platform (choose Python).
4. Upload your ZIP file.
5. Click “Create Application.”
AWS will provision the environment, which may take 5–10 minutes. Once complete, you’ll see a green status and a URL where your app is live.
- Platform: Choose based on your language (Node.js, Python, etc.).
- Instance Type: Default is t3.small; change based on load.
- Environment Type: Single instance or load-balanced.
Step 3: Monitor and Manage
After deployment, the Beanstalk dashboard shows key metrics: CPU usage, request count, latency, and health status. You can also view logs directly from the console or download them from S3.
If your app crashes, Beanstalk will automatically restart the instance or replace it. You can also scale manually or set up auto-scaling based on CPU or network usage.
Check real-time logs using the Logs tab in the AWS Console or via the EB CLI with
eb logs.
Advanced Configuration and Customization
While AWS Beanstalk simplifies deployment, it doesn’t limit customization. You can fine-tune almost every aspect of your environment using configuration files.
These files, placed in a .ebextensions folder in your application source, allow you to modify the underlying infrastructure without leaving the Beanstalk paradigm.
Using .ebextensions for Custom Configurations
The .ebextensions directory contains YAML or JSON files that define configuration settings. These can install packages, modify configuration files, run scripts, or configure services.
For example, to install ImageMagick on your EC2 instances:
packages:
  yum:
    ImageMagick: []
Or to run a script during deployment:
container_commands:
  01_migrate:
    command: "python manage.py migrate"
    leader_only: true
The leader_only flag ensures the command runs only on one instance in a multi-instance environment—useful for database migrations.
- files: Create or modify config files.
- packages: Install OS-level packages.
- container_commands: Run commands after app extraction.
- commands: Run commands during instance setup.
Learn more about
.ebextensionsin the official AWS guide.
Environment Variables and Security
Storing sensitive data like API keys or database passwords directly in code is a security risk. AWS Beanstalk allows you to set environment variables through the console or CLI, which are then injected into your application at runtime.
These variables are encrypted using AWS KMS and are not visible in plain text. This ensures that secrets remain secure even if someone gains access to your source code.
To set environment variables:
- AWS Console: Configuration → Software → Environment Properties.
- CLI:
eb setenv DATABASE_URL=mydb.example.com. - Using
.ebextensions:option_settingssection.
This separation of configuration from code follows the Twelve-Factor App methodology, making your app more portable and secure.
Scaling and High Availability with AWS Beanstalk
One of AWS Beanstalk’s strongest features is its built-in support for scaling and high availability. Whether you’re expecting a traffic spike or building a mission-critical system, Beanstalk has you covered.
Auto Scaling ensures your application can handle varying loads by adding or removing EC2 instances based on predefined metrics like CPU utilization or request count.
Configuring Auto Scaling Groups
When you create a load-balanced environment, Beanstalk automatically sets up an Auto Scaling group. You can customize its behavior:
- Minimum Size: Minimum number of instances (e.g., 2).
- Maximum Size: Upper limit (e.g., 10).
- Scaling Triggers: CPU > 70% for 5 minutes → add instance.
- Cooldown Period: Time between scaling actions.
You can also use predictive scaling to anticipate traffic based on historical patterns, ensuring smooth performance during peak hours.
For example, an e-commerce site might scale up every Friday evening in preparation for weekend shopping traffic.
“Auto Scaling helps maintain performance during traffic spikes without over-provisioning.” — AWS Best Practices
Multi-AZ Deployments for Fault Tolerance
To protect against data center failures, you can configure your Beanstalk environment to run across multiple Availability Zones (AZs). This means your application instances are distributed across physically separate locations within a region.
If one AZ goes down, the others continue serving traffic. The Elastic Load Balancer automatically routes requests to healthy instances.
Additionally, you can enable health checks and automatic instance replacement. Beanstalk monitors each instance and replaces any that fail health checks, ensuring high availability.
- Enable in Configuration → Instances → Availability Zones.
- Use RDS with Multi-AZ for database resilience.
- Combine with CloudWatch Alarms for proactive monitoring.
Cost Management and Optimization Tips
While AWS Beanstalk itself is free, the underlying resources (EC2, S3, ELB, etc.) incur costs. Understanding how to optimize these is crucial for budget-conscious teams.
A common misconception is that PaaS solutions are always cheaper. In reality, Beanstalk can be more expensive than a well-optimized EC2 setup if not configured properly.
Understanding the Cost Structure
You pay only for the AWS resources your application consumes. Beanstalk doesn’t charge an additional fee. Key cost components include:
- EC2 Instances: Based on instance type and uptime.
- Elastic Load Balancer: Per hour and data processed.
- S3: Storage for application versions and logs.
- CloudWatch: Monitoring and alarms.
- Data Transfer: Outbound traffic to the internet.
For example, a t3.small instance costs around $0.0208/hour, and a load balancer adds ~$0.025/hour. Over a month, this can add up—especially if you’re running multiple environments.
Strategies to Reduce Costs
To keep costs under control:
- Use smaller instances for dev/staging (e.g., t3.micro).
- Terminate unused environments (e.g., feature branches).
- Enable S3 lifecycle policies to delete old application versions.
- Use Spot Instances for non-critical workloads (via custom AMIs).
- Monitor usage with AWS Cost Explorer and set budgets.
For low-traffic applications, consider switching to AWS Lambda or API Gateway to save costs, even if it means re-architecting parts of your app.
“Right-sizing your instances can reduce costs by up to 70%.” — AWS Cost Optimization Whitepaper
Common Pitfalls and How to Avoid Them
Despite its ease of use, AWS Beanstalk can lead to issues if not managed carefully. Here are some common pitfalls and how to avoid them.
Pitfall 1: Ignoring Logs and Monitoring
Many developers deploy and forget. But without monitoring, you won’t know when your app starts failing. Beanstalk provides basic health metrics, but you should also set up CloudWatch alarms for critical thresholds.
Regularly check the logs—especially during deployment failures. Common issues include missing dependencies, incorrect file permissions, or failed database migrations.
Pitfall 2: Over-Customizing the Environment
While .ebextensions are powerful, overusing them can make your deployment brittle. Complex scripts or too many OS-level changes can break during AWS platform updates.
Instead, consider using Docker or moving to ECS if you need deep customization. Keep Beanstalk configurations minimal and focused on app-specific needs.
- Use Docker if you need full environment control.
- Avoid hardcoding paths or dependencies in scripts.
- Test configuration changes in a staging environment first.
Pitfall 3: Not Planning for Disaster Recovery
What happens if your environment is accidentally deleted? Without backups, you could lose everything. Always enable versioning in S3 for your application packages and use RDS snapshots for databases.
You can also use Infrastructure as Code (IaC) tools like AWS CloudFormation or Terraform to define your Beanstalk environment. This allows you to recreate it quickly in case of failure.
“Infrastructure as Code is not optional—it’s essential for resilience.” — DevOps Best Practices
What is AWS Beanstalk?
AWS Beanstalk is a fully managed service that simplifies deploying and scaling web applications on AWS. It supports multiple languages and automates infrastructure management while allowing access to underlying AWS resources.
Is AWS Beanstalk free to use?
Yes, AWS Beanstalk itself is free. You only pay for the underlying AWS resources your application uses, such as EC2 instances, S3 storage, and Elastic Load Balancers.
Can I use Docker with AWS Beanstalk?
Yes, AWS Beanstalk supports Docker. You can deploy single-container or multi-container Docker environments, making it flexible for containerized applications.
How does AWS Beanstalk handle scaling?
Beanstalk uses Auto Scaling groups to automatically add or remove EC2 instances based on traffic. You can configure scaling policies based on CPU, network, or custom CloudWatch metrics.
What happens if an instance fails?
If an EC2 instance fails a health check, AWS Beanstalk automatically replaces it with a new one to maintain application availability and performance.
In summary, AWS Beanstalk is a powerful, developer-friendly platform that bridges the gap between simplicity and control. It’s ideal for teams that want to deploy applications quickly without sacrificing scalability or reliability. By understanding its architecture, leveraging automation, and avoiding common mistakes, you can harness its full potential. Whether you’re launching a startup MVP or managing enterprise workloads, AWS Beanstalk offers a proven path to cloud success.
Recommended for you 👇
Further Reading: